You do not always see the animal. A print in mud, a cluster of pellets or a torn shoot can show where to look next. Start by describing what you can see, then consider possible causes. Several independent clues are more useful than one confident guess.
For recognising the animal itself, try our deer identification photo quiz. This page is about reading signs and learning from observations, not following or disturbing deer.
Tracks and trails
Deer hoof prints are often called slots. Look for a pair of elongated impressions, usually narrowing towards the front. Sheep also have cloven hooves, but their prints tend to look rounder. Mud, movement and overlapping prints can obscure the outline, so photograph several clear impressions with a scale rather than relying on one mark.
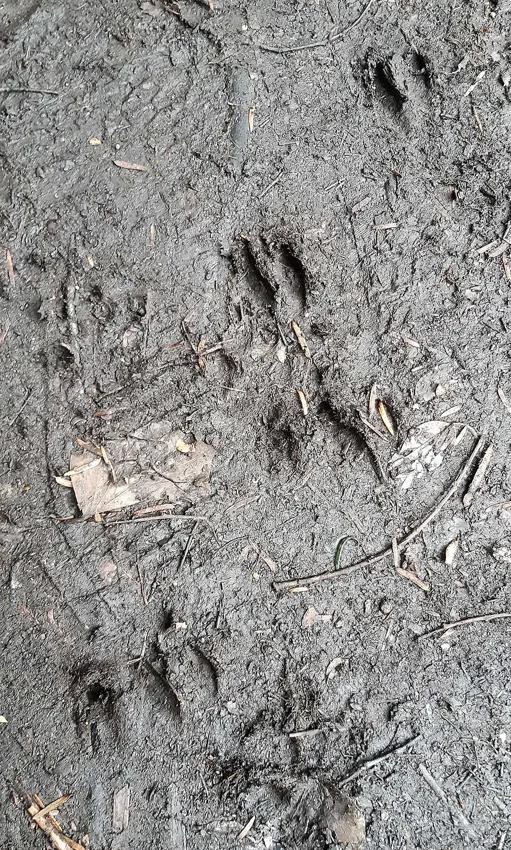

Record length, width and the surface. Look along the trail for more prints, nearby droppings or feeding signs. A worn route alone does not establish which animal uses it. Do not assign a deer species from print size alone: animals differ in age and size, and prints are not always complete.
Compare the photographs in The Wildlife Trusts’ track guide, which also shows common non-deer tracks.
Droppings: identifying deer poo
Deer droppings commonly appear as dark, smooth pellets, often with a pointed end. Their appearance varies, and pellets may stick together. Droppings alone are not a reliable way to separate the six deer species. Sheep droppings can also be similar.
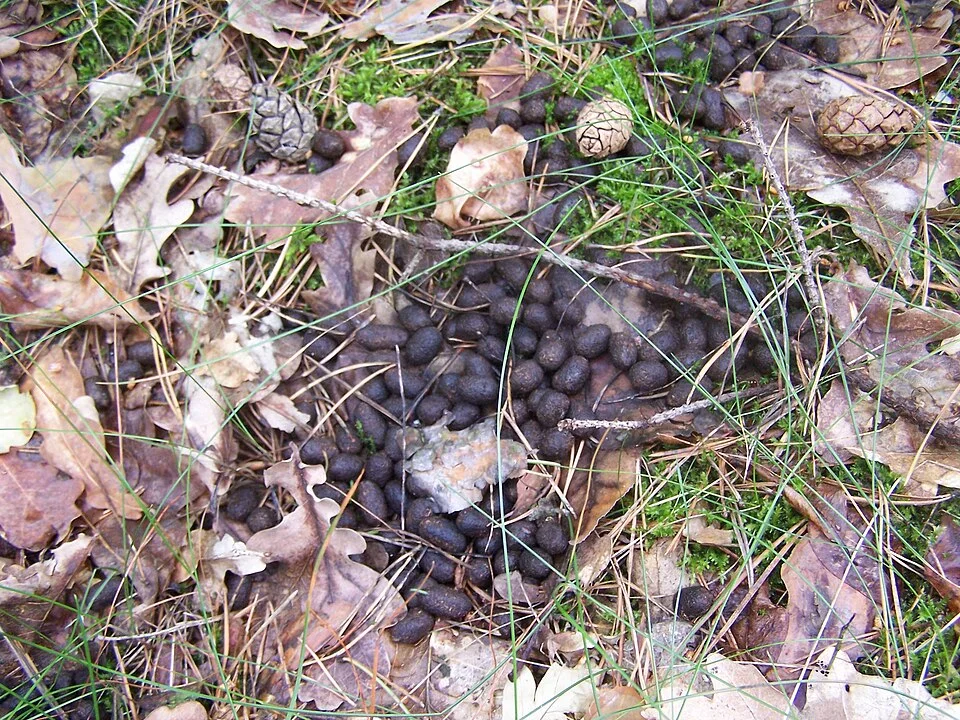

Rabbit pellets are usually rounder and show more fibrous plant material. For a tentative identification, record size, shape and whether the pellets are separate or clustered, then look for supporting signs. The Mammal Society’s photographic guide compares deer, rabbit, hare and other mammals.
Photograph droppings without touching them. Keep a scale beside, rather than in, the deposit and avoid contaminating hands or equipment. Do not use the colour or apparent freshness of a single pile as a precise clock for when an animal passed.
Try it: small dark pellets beside a woodland path. Which deer?
Not enough evidence to name a species. Record their appearance and size, then look for tracks, browsing and other clues. A photograph of pellets is useful evidence, not a certain species identification.
Browsed shoots and vegetation damage
Browsing means feeding on buds, shoots and leaves. Look closely at the end of a damaged shoot: deer often leave a torn, ragged edge, whereas rabbit and hare cuts tend to be sharper. Sheep can produce damage similar to deer; wool caught nearby may help distinguish them.
Record the plant, the type of injury, its height and the date. Check a few neighbouring plants rather than assuming all missing growth has the same cause. For photographs of browsed shoots, use the Forestry Commission’s deer and grey squirrel damage visual guide.
Try it: a ragged shoot end, with wool caught on the nearby fence
Consider sheep as well as deer. The torn end is not enough to distinguish them. Check livestock access and look for other signs before recording the cause.
Fraying and bark stripping
Fraying is rubbing damage caused by antlers, including during velvet removal and territory marking. Bark stripping involves bark being removed from the stem or branches. Look at the injury itself, any tooth marks, its height and the season; damaged bark alone is not proof of a particular deer species.
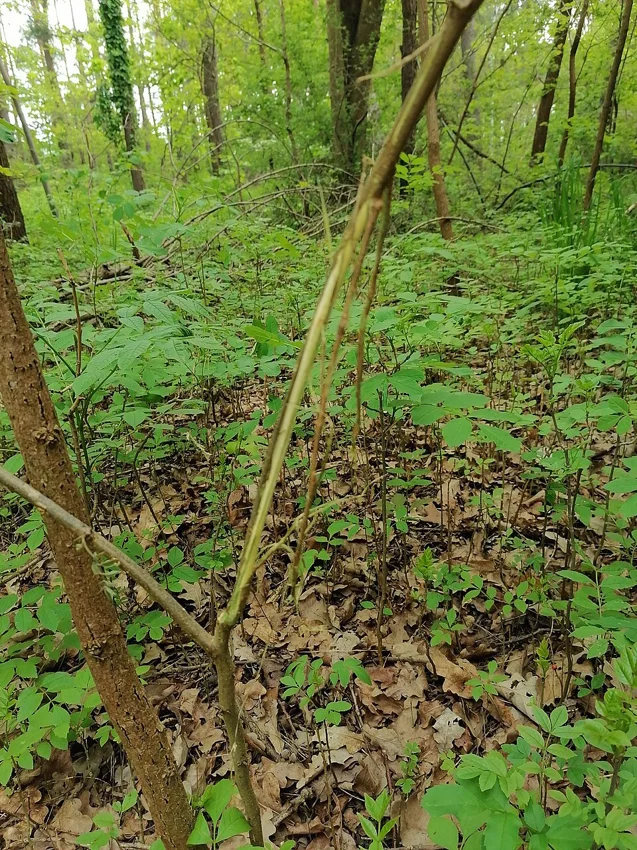

Try it: bark is rubbed away on a young stem, but there are no clear tracks
Record the rubbing damage; keep the animal identification tentative. Photograph the whole stem and a close view, note its height, and check nearby plants and the ground for additional evidence.
The distinctions between browsing, gnawing and rubbing are explained in Forest Research’s mammal damage guide.
From one damaged plant to a wider pattern
A browse line or repeated loss of young growth can be more informative than a single damaged twig. Deer pressure can affect woodland regeneration and the shrub layer. Damage height is a clue, not an exact species test. The Forestry Commission’s deer guidance describes different forms of damage and their impacts.
Use our deer damage guide to explore the wider picture, or woodland monitoring guide to make repeat observations.
Make a useful field record
Use this checklist to plan your observation. It works without JavaScript; ticks are not submitted or saved by this site.
Download the woodland observation sheet for repeat visits. Photograph signs from accessible ground, give wildlife space and leave young animals undisturbed. For more practice, return to study and revision.