Gralloching removes the stomach and intestines after a deer is killed. It is part of preparing food: preventing contamination, examining the animal and getting the carcass cooled all matter. This guide follows UK best-practice principles and is intended for revision alongside practical instruction.
Photographs below show a dead deer, an open body cavity and removed organs. They are behind labelled disclosures so you can choose when to view them. The written guide remains readable without opening them.
Using this for DSC 1 and DSC 2
For DSC 1, work through the reasons behind each stage: animal welfare, personal safety, contamination, recognition of abnormalities and the food-chain decision. Use your provider’s materials for the full assessment syllabus. DMQ’s DSC 1 requirements remain the authority.
For DSC 2, practise with an instructor before collecting evidence. You need to demonstrate competence to an Approved Witness and explain your decisions. Study the current Individual Cull Record with your Assessor; this page is not the assessment checklist. DMQ permits different gralloching methods: the outcome and your competence matter. Witnesses cannot coach you through an assessed task. See DMQ’s DSC 2 guidance.
Check your trained-person status separately. DMQ’s current announcement says that trained-person status is awarded through DSC 1 with an approved carcass-inspection video requirement. It also describes a free upgrade for eligible holders awarded DSC 1 after April 2021. Follow the current DMQ trained-person instructions and check your certificate with your centre; older pages may describe a different arrangement. Reading this guide does not award trained-person status or replace observed practical assessment.
Before you start
Plan the extraction, transport and chilling before the outing. A clean gralloch is of little value if the carcass then sits warm in a dirty vehicle. Arrange who will examine it, where the organs will be kept, and the intended supply route.
Have these ready:
- A sharp, clean knife with a secure grip and a safe sheath; suitable cleaning equipment and a clean spare are useful.
- Spare disposable food-contact gloves, waterproof dressings, potable water, soap and a hygienic way to dry hands.
- Clean, washable protective clothing; a headtorch for adequate light.
- Suitable lifting equipment if suspending the deer, or a clean means of supporting it without contaminating the opening.
- Appropriate ties, labelled containers for retained organs, a carcass tag and a way to record findings.
- A clean extraction tray or sled, suitable transport and access to chilling.
Cover cuts before putting gloves on. Gloves do not replace handwashing. Change them whenever they become contaminated or torn, and between dirty and clean tasks. Keep phones, ropes, clothing, dogs and the outside of the hide away from exposed meat. Keep your supporting hand out of the blade’s path; never work beneath an insecurely suspended carcass.
The Deer Initiative gralloching guide describes equipment and method choices. Its sequence can vary with the deer, shot damage and facilities.
The gralloch sequence
These are revision prompts for a method you have been taught. Learn the anatomy and knife movements with a competent instructor before attempting them independently.
1. Confirm death and make the working area safe
Approach cautiously and confirm death using the checks taught during practical training. Any sign of life requires the appropriate humane follow-up, not the start of a gralloch. Once death is confirmed, make the firearm safe before carcass handling. Record the animal’s behaviour before the shot and inspect its external condition.
2. Position the deer and begin promptly
Choose clean ground and good light. Secure suspension can improve access; ground gralloching requires particular care to keep the opening clear of soil and vegetation. Do not delay unnecessarily for a more convenient location. Bleed if necessary, using your taught method.
3. Control the foodpipe and open the abdomen
Identify the oesophagus (foodpipe), distinct from the trachea (windpipe). Seal it before cutting if your method draws it back through the chest. Lift the abdominal wall away from the gut and make controlled outward cuts, protecting the stomach and intestines and keeping hair out.
4. Free and control the rectum
Avoid releasing faeces. Use the freeing and sealing method you have been taught; do not pull a contaminated anus through clean tissue. Protect the bladder from puncture. Clean or change contaminated gloves and equipment before returning to clean work.
5. Remove the green offal
Support the stomach and intestines, releasing attachments carefully rather than pulling hard. Keep them intact and available for examination. If contents escape, stop and address contamination before continuing. Do not discard the gralloch before inspection.
6. Complete dressing and inspection
Removal of the pluck involves the diaphragm, windpipe and chest attachments. Complete the necessary dressing in the field or promptly in the larder, according to conditions. Retain the organs needed for examination and keep them identified to the correct carcass.
For the illustrated method, use the UK gralloching PDF, including its discussion of alternative approaches. Opening the sternum or pelvis is not a universal requirement for every field gralloch; additional openings need protection during extraction. Do not adopt a technique solely because it appears in a photograph.
Photographs: what to observe
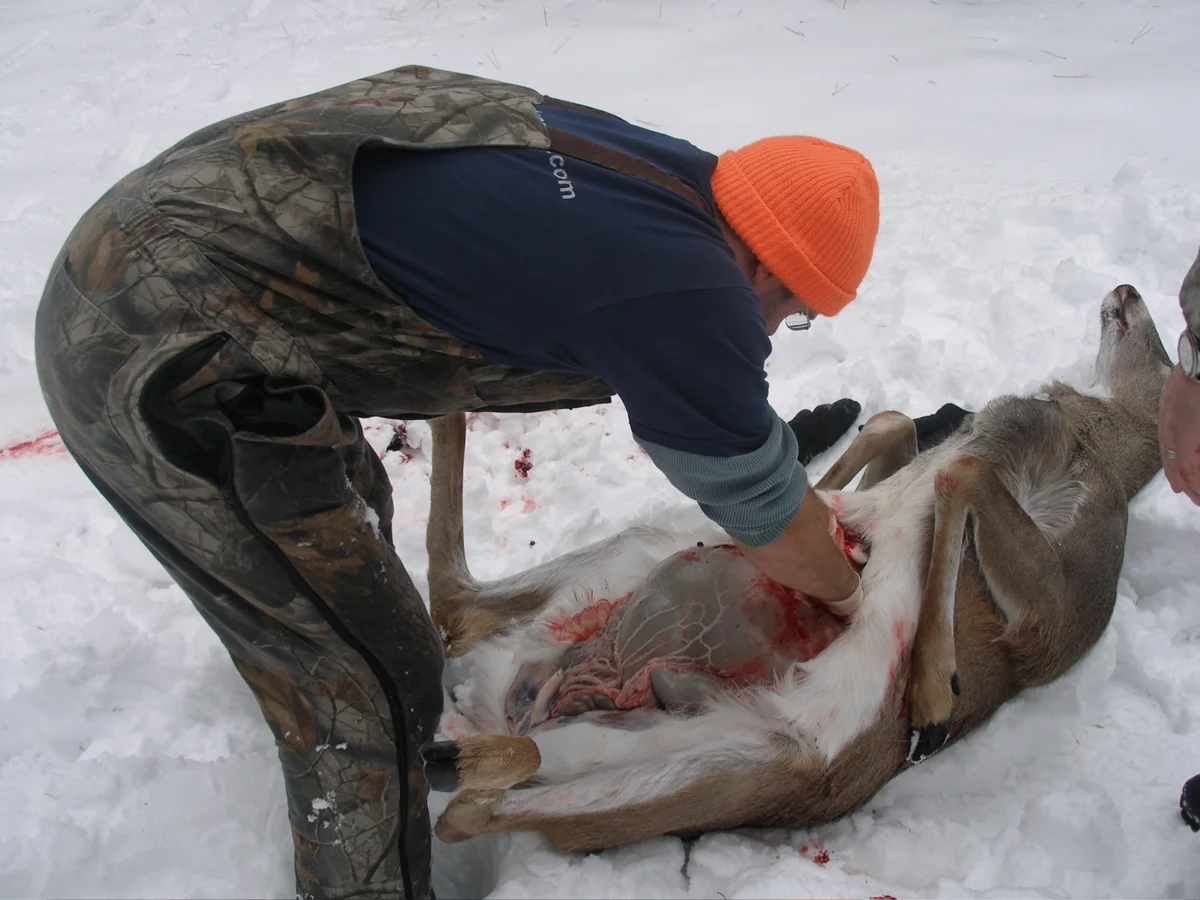
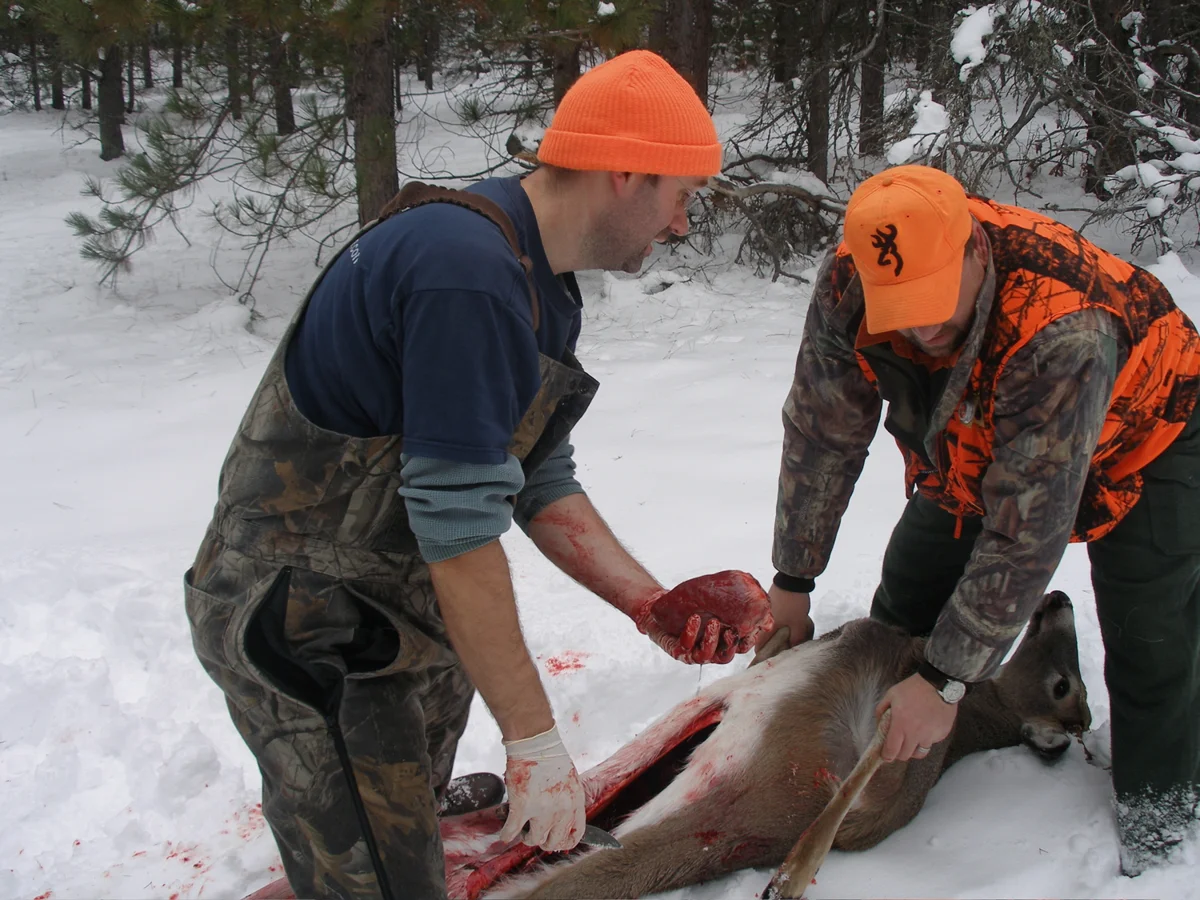
These two photographs show a white-tailed deer in Michigan, USA, photographed by MJCdetroit. They illustrate an opened abdomen and handling of a removed organ, not a complete UK training sequence or evidence of DSC compliance. Ground contact, sleeves, helpers’ hands and equipment all need consideration. Snow is not a sanitised work surface, and the photographs cannot establish the hygiene of the process.
Show photograph: the opened abdominal cavity (graphic)

Show photograph: handling a removed organ (graphic)

For UK anatomical photographs, open the Deer Initiative carcass-inspection guide, pages 2–4. It shows the mesenteric chain, pluck and head lymph nodes. For transport and larder comparisons, see the FSA photographic annex. These external PDFs contain graphic photographs.
Inspect systematically
Inspection begins with the live animal’s behaviour and continues through dressing. Look at the whole animal, not just a favourite lymph-node check. An instructor should teach you what normal tissues look and feel like, and how age, season and reproductive condition affect appearance.
- Outside: body condition, head and mouth, legs and feet; unexplained swellings, wounds, discharge or severe diarrhoea.
- Abdomen: gut, spleen, gastric and mesenteric lymph nodes; unusual fluid, adhesions, growths or smell.
- Chest and pluck: lungs, heart, liver and diaphragm; bronchial, mediastinal and portal lymph nodes.
- Remaining tissues: kidneys, reproductive organs and head nodes, including sub-maxillary and retropharyngeal nodes; complete the examination rather than stopping after green offal removal.
Note abnormal size, colour, consistency, abscesses, cysts or extensive parasite damage. Do not routinely slice lymph nodes or cut into suspicious lesions. The carcass-inspection guide recommends leaving nodes uncut. Its anatomical guidance is useful; use the current FSA guidance below for supply rules and current reporting arrangements.
Hygiene and contamination decisions
Work from clean tasks to dirty tasks wherever possible. After handling the hide, rectum or gut contents, stop and restore clean hands, gloves and tools before touching exposed meat. Clean equipment to remove debris before applying a suitable food-area disinfectant; follow its dilution, contact-time and rinsing instructions. Keep chemicals away from the carcass.
Do not hose or wipe gut contents across the cavity. Small, localised surface contamination may be removed by trimming back to clean tissue with clean equipment. Widespread contamination, a bad smell or uncertainty about fitness requires a stop and a competent assessment, not an attempt to wash the carcass into acceptability. The Deer Initiative inspection guidance explains trimming rather than washing contamination.
If there are unexplained abnormalities, isolate and identify the carcass and associated organs, record what you observed and contact the receiving establishment or an appropriate veterinary adviser. Do not sign a declaration saying that no abnormalities were found. Suspected notifiable disease must be reported to APHA; in Northern Ireland contact DAERA. Follow instructions before moving, sampling or disposing of suspect material.
Extraction, cooling and records
Keep exposed meat off the ground during extraction. Use clean, washable transport surfaces, separate carcasses from fuel, chemicals, dogs and dirty equipment, and allow airflow. Avoid stacking warm carcasses or sealing them in plastic that traps heat.
For large wild game supplied to an approved game handling establishment (AGHE), the FSA requires chilling to begin within a reasonable time and achieve no more than 7°C throughout the meat. This is a meat-temperature requirement, not just a chiller-display reading. The guidance says carcasses should not be frozen; natural cooling is sufficient only where conditions actually allow the requirement to be met. Deliver as soon as possible after examination. See FSA Wild Game Guidance, section 4.1.
Keep a unique identification linking the carcass, retained parts and records. Record the date, time and place of killing, the animal’s details, observations, examination and onward destination. Record cooling checks as required by your handling arrangements.
For AGHE supply, a trained person can issue the numbered declaration only when the examination finds no abnormal characteristics, no abnormal behaviour was seen before killing and environmental contamination is not suspected. If abnormalities prevent that declaration, inform the Official Veterinarian; the head (excluding antlers, horns and tusks) and viscera other than stomach and intestines must accompany the carcass. The same parts must accompany it if no trained person was available. Maintain their correlation. Suspected notifiable disease takes priority: contact the authority and follow its instructions.
Do not assume one supply route’s rules cover every sale or gift. The FSA guide distinguishes personal consumption, direct supply and AGHE supply, including registration and traceability. It covers England, Wales and Northern Ireland; use Food Standards Scotland’s wild-game guidance for Scotland.
Dispose of offal and rejected material through the appropriate route. Do not assume everything may be left at the kill site: disease suspicion and where the by-products arise affect the rules. Follow the FSA guide’s animal-by-products section and the land manager’s arrangements. Clean and disinfect reusable kit before the next carcass.
Questions to practise before assessment
Use these with your instructor before a witnessed outing. They are preparation prompts, not official assessment questions.
- What would make you change your planned gralloching location or method?
- Where can contamination pass from hide, gut or equipment to meat, and how will you interrupt it?
- Can you identify the organs and lymph nodes on a real carcass and recognise an abnormal finding?
- What will you do if the gut is punctured, an organ looks abnormal or disease is suspected?
- Can you explain the cooling, tagging, declaration and retained-parts requirements for your intended destination?
- Can you complete the process independently and explain your decisions without prompting?
Return to study and revision, or read the deer culling and law guide. This is independent educational material, not a DMQ-endorsed course or a guarantee of assessment success.